Mount Carmel at Home - 12/05/2020
Welcome to Mount Carmel at Home. These sessions will enable parents to carry out fun and educational home learning activities with their children. We recommend establishing a routine and setting aside a time in day for home learning. It is preferable to do these activities in the morning when children are more alert than towards the end of the day when they can be tired and less cooperative.
Share your child's learning with us by uploading photos and videos to their Learning Journey on Famly, by uploading on Instagram and adding the hashtag #MountCarmelatHome or posting on our Facebook page. Your child's teachers will love to see what you have been up to!
Click here to download today's activity sheet and resources.
The sound of the week is "L" - https://youtu.be/U2HYM9VXz9k?t=293
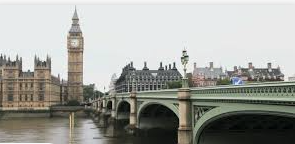
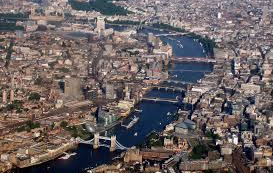
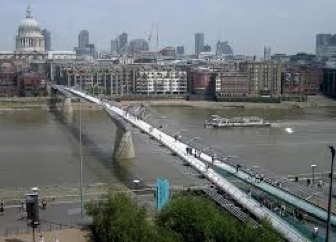
Theme: London
Today’s activities for preschool children
Activity 1 - Addition with Lego

What you’ll need |
|
Method | Show your child the worksheet and ask them to get out the correct number of Lego bricks shown in the picture (in the example). Point to the numbers under the pictures as they go, to demonstrate what they are doing. You could show them the addition and equals sign and explain that we use them to write sums. Follow the sums with your finger and talk them through as though it was a story eg: one, add/plus one equals two etc. This will help your child grasp the meaning of each symbol. Next, let them join them together to make a tower and count the total. Can they find the correct number on the number line at the top of the page? Then they should write it in the relevant box. Repeat this with the other sums, supporting your child as and when they need it. They may want to try making up some sums of their own too. |
What did we learn? | Mathematics: Numbers – Finds the total number in 2 groups by counting all of them, beginning to use the vocabulary involved in adding and subtracting, records, using marks they can interpret and explain. Literacy: Writing – Ascribes meanings to marks that they see in different places. |
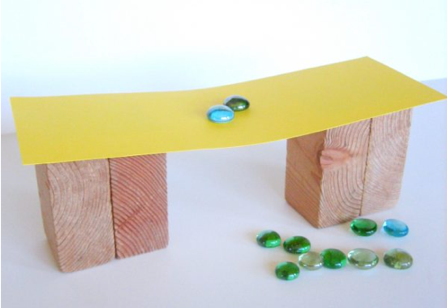
Activity 2 - Building and testing bridges
What you’ll need |
|
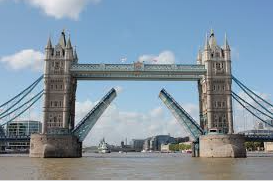
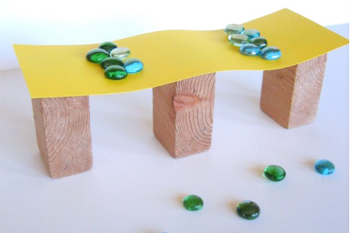
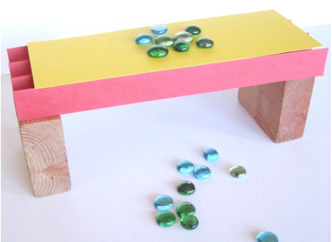
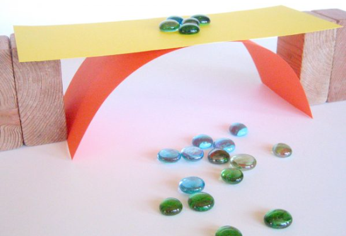
Method | To continue with the theme of bridges yesterday we are going to try and build different types of bridges and test how strong they are Show your child the pictures of the bridges above. Explain these bridges are famous bridges in London. Have you been across any of them? Talk about why we need bridges. Who uses them? Show your child the equipment and ask if they can build their own bridge. You may need to support them at first by helping to build a simple beam bridge as shown in the examples.
Put two blocks together and explain bridges are often symmetrical, the same on both sides, so suggest your child copies what you have done opposite. Then point to the card and ask where it could go. Again if your child needs support suggest that the bridge needs something to go across the top. Next ask your child, "Shall we see how strong it is?" and ask your child to place the pebbles, beads or coins onto the bridge carefully one at a time and count how many pebbles you can put on the bridge before it collapses. Record how many pebbles the first bridge can hold. Ask your child if they can build several more bridges and record the number of pebbles each bridge can hold. Give suggestions if your child needs help in thinking of another bridge.
Say, "Lets try this", or, "What happens if we do this?" Giving suggestions can help develop independent thinking and allowing your child to build a bridge that may not work helps to promote problem solving. However, there are example of bridges provided if needed. When your child has finished this activity show them the answers recorded asking what each number is. Explain that the strongest bridge is the one that can holds the most pebbles and ask you child if they can tell you which one held the most. You may need to help further by asking which is the biggest number. You can then reverse the question and ask which bridge was the weakest, the bridge that held the least amount of pebbles. Send us some of your bridge designs, we would love to see them! |
What did we learn? | Understanding the World (UW) Technology - we are learning how toys or objects work by pressing parts or lifting flaps to achieve effects and talking about why things happen and how they work. Maths (M) We are learning to match numerals and quantities correctly. Expressive arts and design (EAD) We are learning to use various construction materials and join construction pieces together to build and balance |
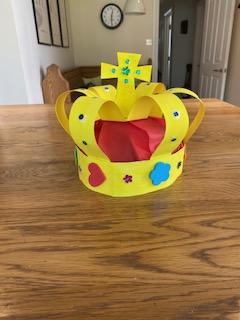
Activity 3 - Crown Jewels
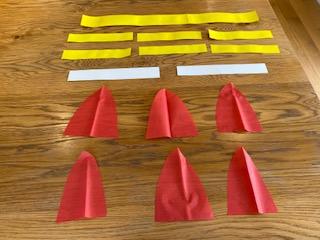
What you’ll need |
1 strip - 2 inch deep and long enough to go around head, 6 strips - 1 1/2 inch by 8 inch
|
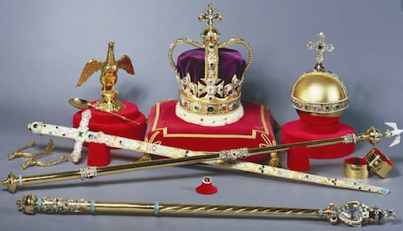
Method | Our Queen has lots of jewels called the Crown Jewels. Most of them are around 350 years old and worth lots and lots of money so they are kept safe in the Tower of London. The most famous piece in the Crown Jewels is the Crown.
Here is a Crown you can make yourself (it isn't as difficult as it looks!) The adult will need to lead this activity but ask your child to help by keeping pieces in place or helping to stick or staple parts together. This supports cooperation and following instructions.
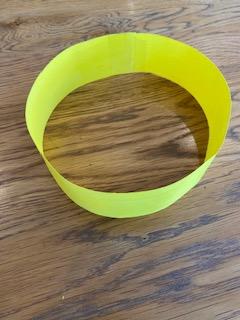
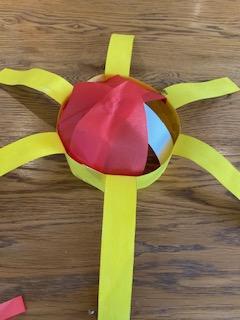
Start with making the Crown base. Take the long piece of yellow card and fit it around your child's head and secure it with glue, Sellotape or staples.
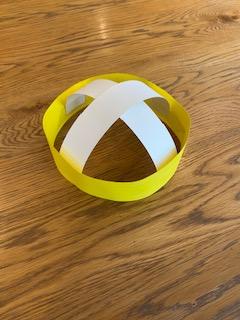
Next take the two strips of card and secure one of them across the middle section of the base, spanning the circle's diameter, sticking the ends of the strip to the inside of the base. Place the second piece of card across the top of the first piece to make a cross and again stick the ends to the inside of the base.
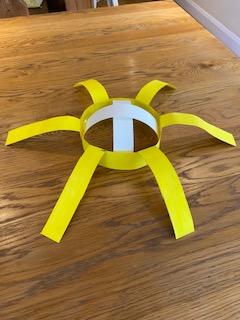
Next, take one of the six remaining strips and stick one end on the inside of the base. Then you can do the same with the other five strips, spacing them evenly around the base.
The next stage is to attach the red petal shapes to the crown. Glue the bottom of these petals along the inside of the crown's base and the tips onto the centre of the crown supports.
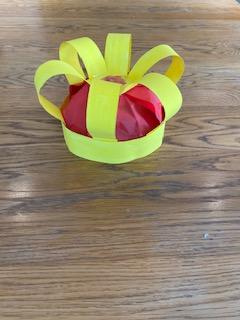
Now you can bring each of the six strips to the centre, sticking them on top of the red tissue paper, on top of the supports.
Next make a cross topper for the centre of the crown. Make sure there are flaps on the bottom, front and back, which are used for attaching it to the centre of the crown and to keep it upright. Now your King or Queen can decorate their crown with lots of jewels or however they wish. We would love to see your Kings and Queens wearing their crowns! |
What did we learn? | Expressive arts and design (EAD) We are learning to manipulate materials to achieve a planned effect and construct with a purpose in mind, using a variety of resources. Communication and Language (CL) We are learning to respond to instructions involving a two-part sequence. |